Blog
Create Container
In this article we will guide you how to create a server side container on SprTags.
To be able to receive, format and/or enrich the incoming website data, you first need to create a SprTags container. The data will then be send through your gtm server container to any data destination you want. Before you start, it is better to already have a gtm config id and if you want to use a custom domain to check if you have access to the dns settings.
Containers -> Create Container
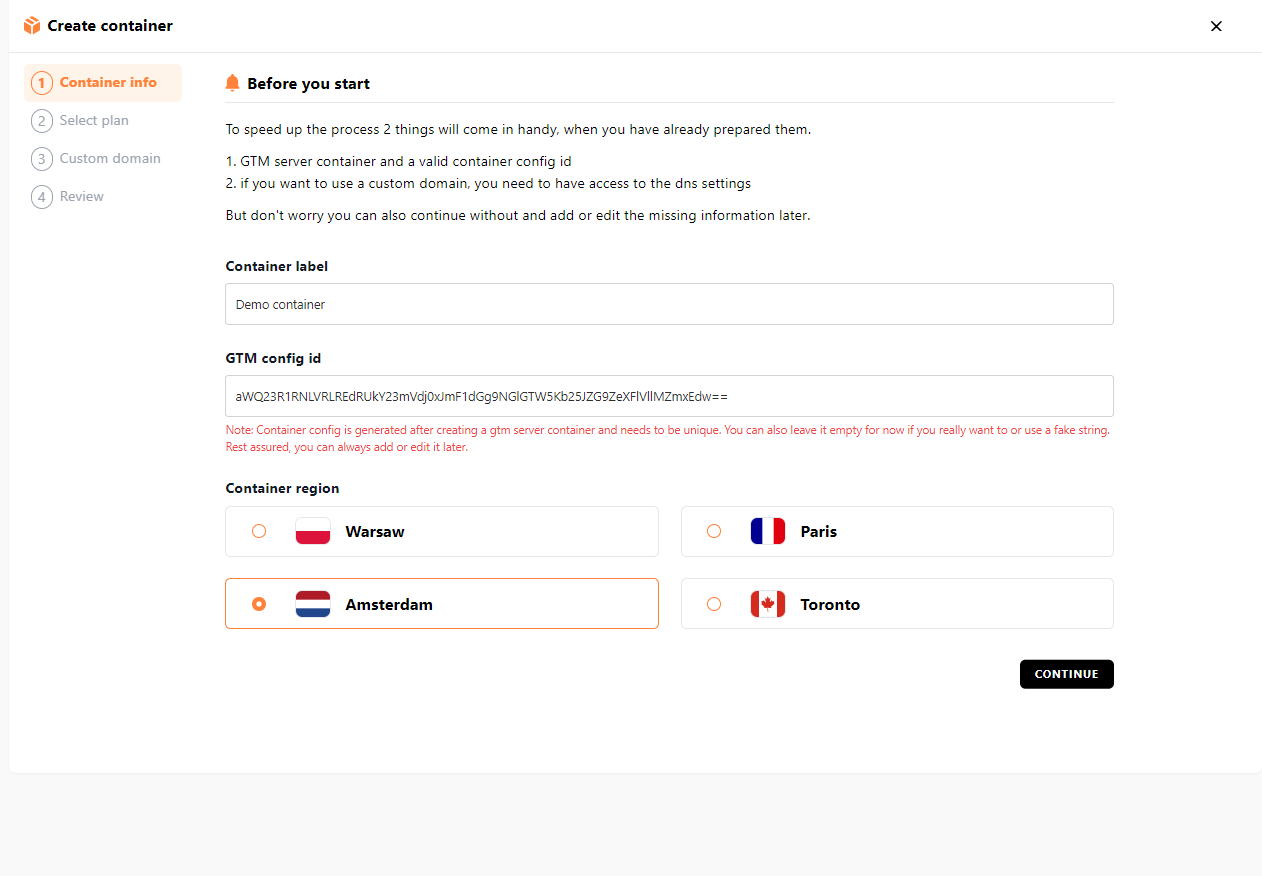
CONTAINER INFO
Container name
Choose any name just to identify you container
Container config
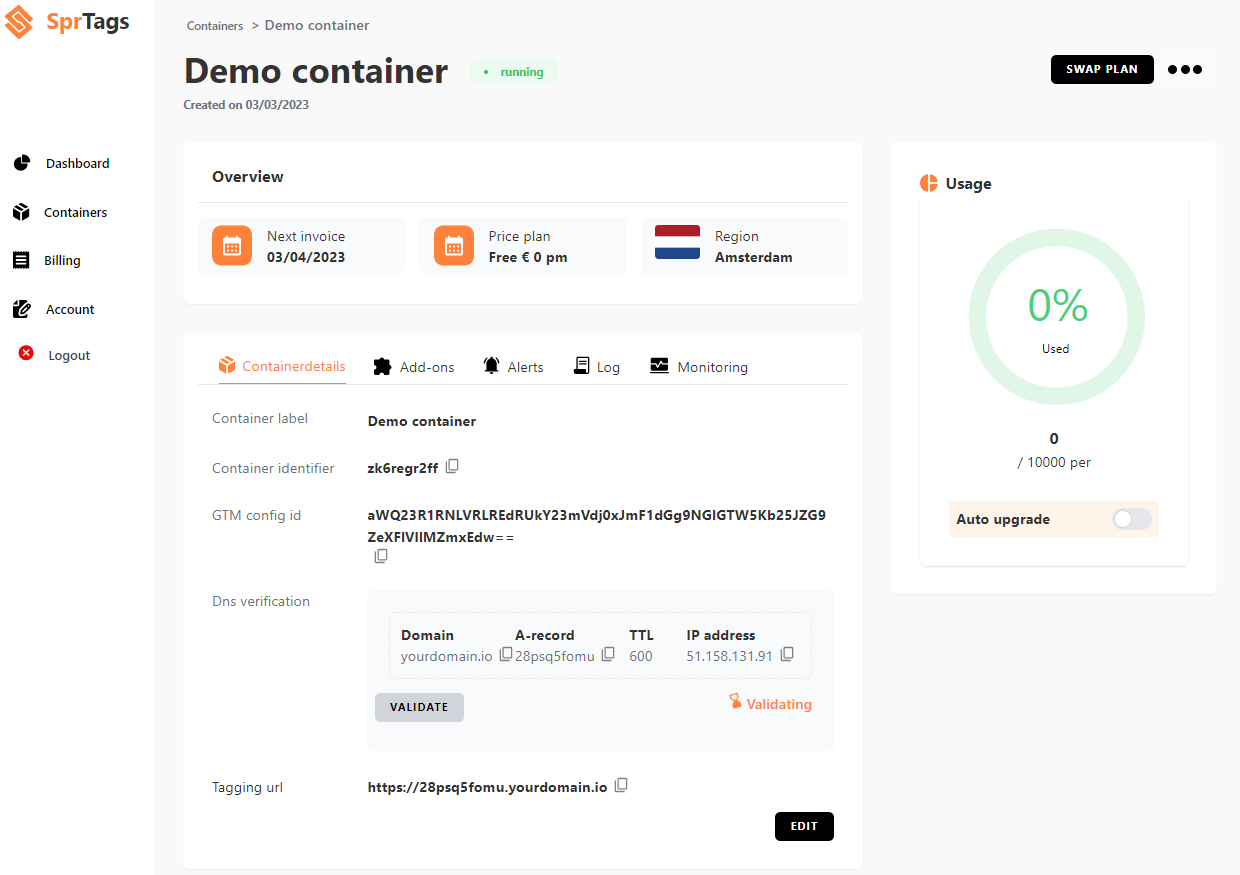
GTM config token to connect your gtm server side container to the SprTags containerBecause the gtm config id is unique per gtm server container it also has to be unique for the SprTags container. However you can still create the container and correct it later. Just keep in mind that the the container can only start collecting with a valid gtm config token
Region
Choose a region closest to your customers and your website. This will keep the latency as low as possible.
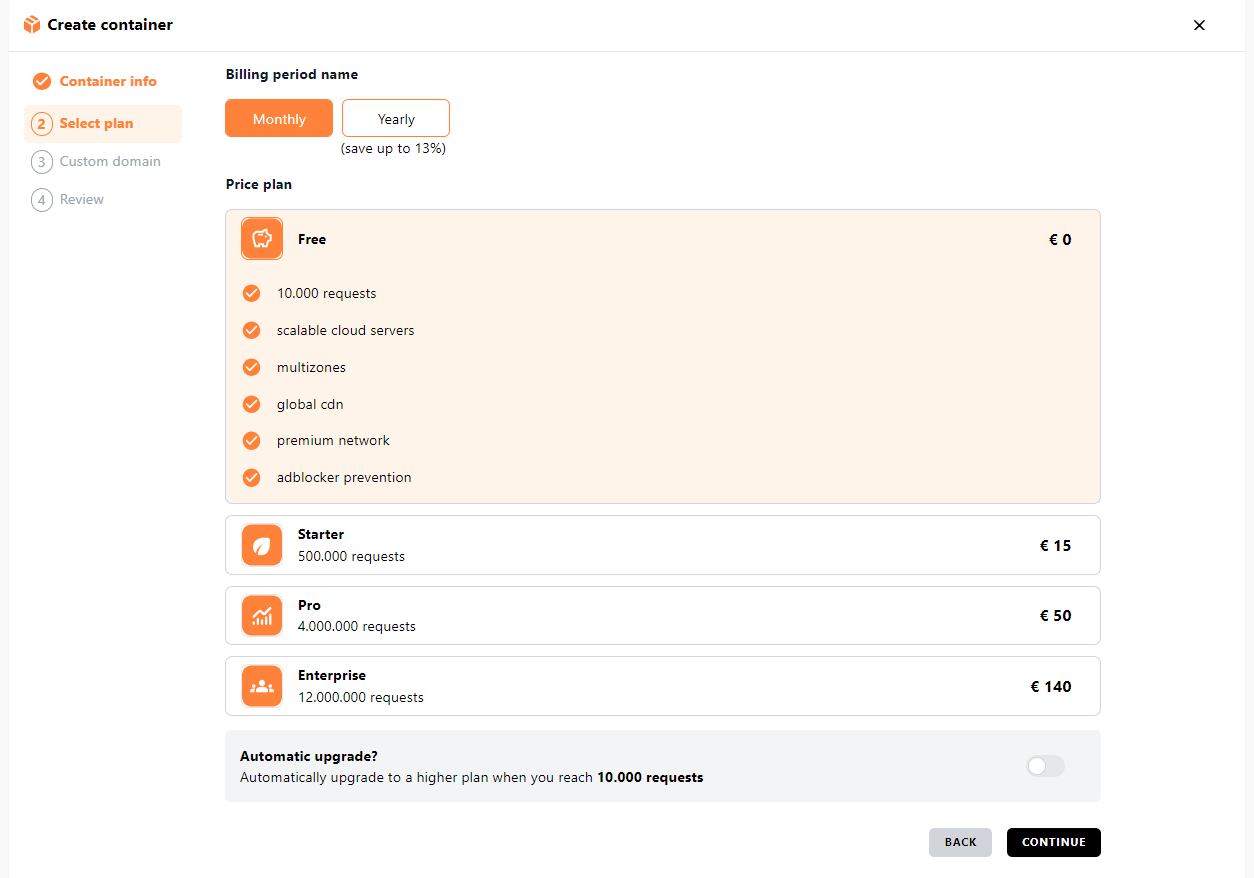
Select Payment
We offer various plans to suit your needs.You can always up- or downgrade and of course cancel anytime you want.
When you choose a yearly subscription then you get 2 months for free.
For our early birds we have made all features for all containers available, so the only difference between the plans is the maximum of requests your container generates per month.
Autoupgrade
If you select Autoupgrade, then we automatically upgrade your subscription to a higher plan when you reach the maximum requests of the current selected planAutoupgrade can also be enabled or disabled after the container is being created.When you almost reach maximum requests then you will of course be notified upfront.
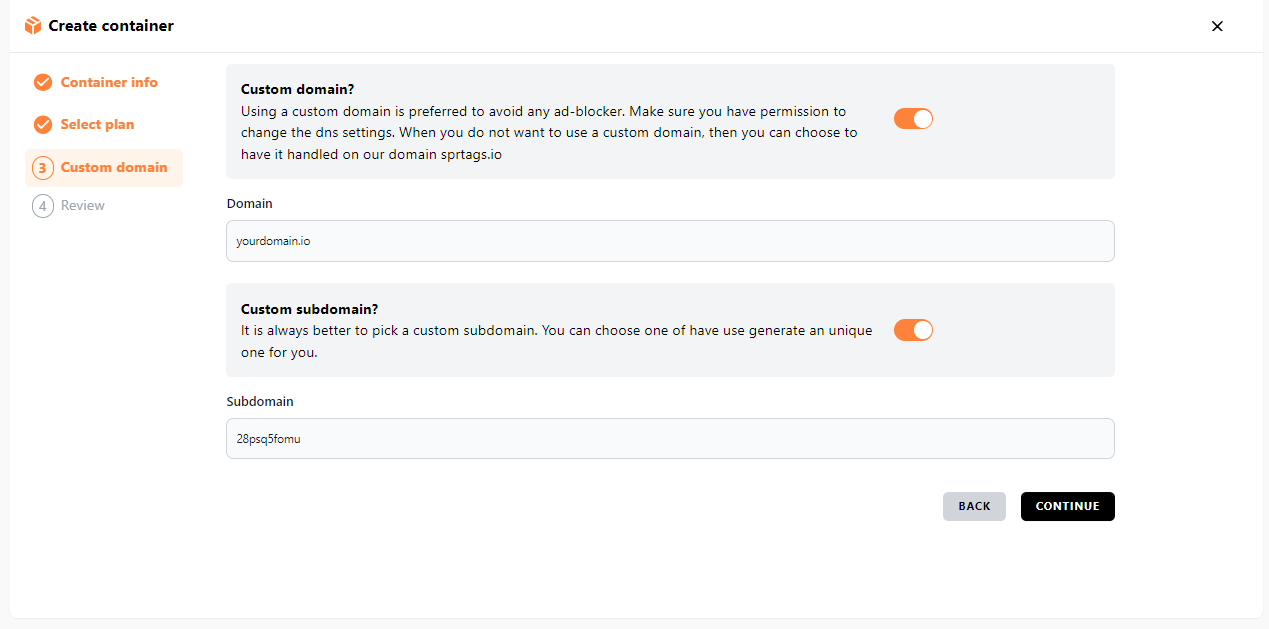
Choose domain and subdomain
When the google tagging url which by default is googletagmanager.com/gtm.js is changed to a custom url then it will be more difficult for ad blockers to recognize it. This way you can collect more accurate data since less requests are being blocked. The more unique or abstract the url is the better
Custom domain?
Using a custom domain is preferred to avoid any ad-blocker. Make sure you have permission to change the dns settings. When you do not want to use a custom domain, then you can choose to have it handled on our domain sprtags.io
Custom subdomain?
It is always better to use a custom subdomain. You can pick one yourself or have us generate a unique one for you.
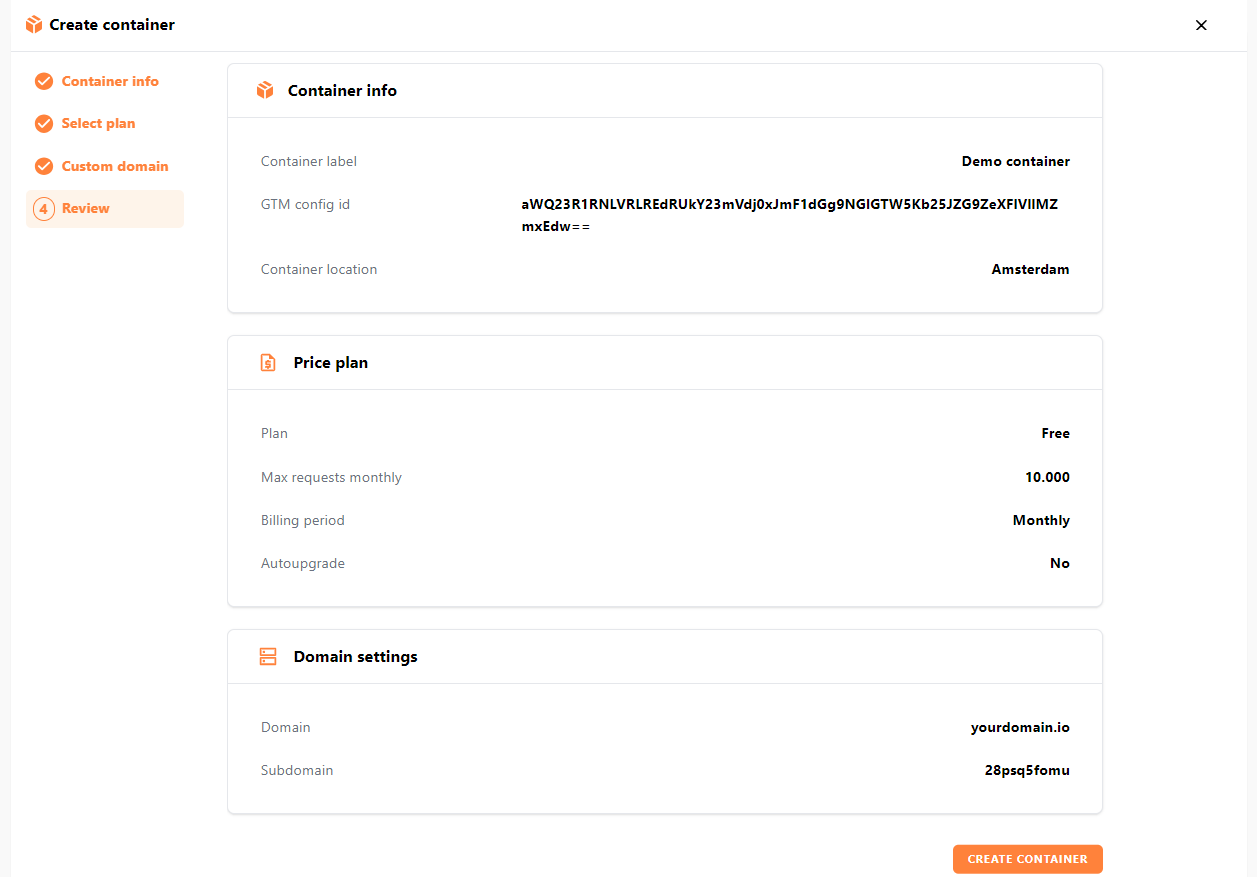
Review
Before you go to the checkout you can still review your information and correct them if needed.If you think the information is correct then a loader will be shown while the container is being created in the background.
Don't worry you can always change or delete a container and you will be refunded automatically according to our Not happy? No payment! policy.
Checkout
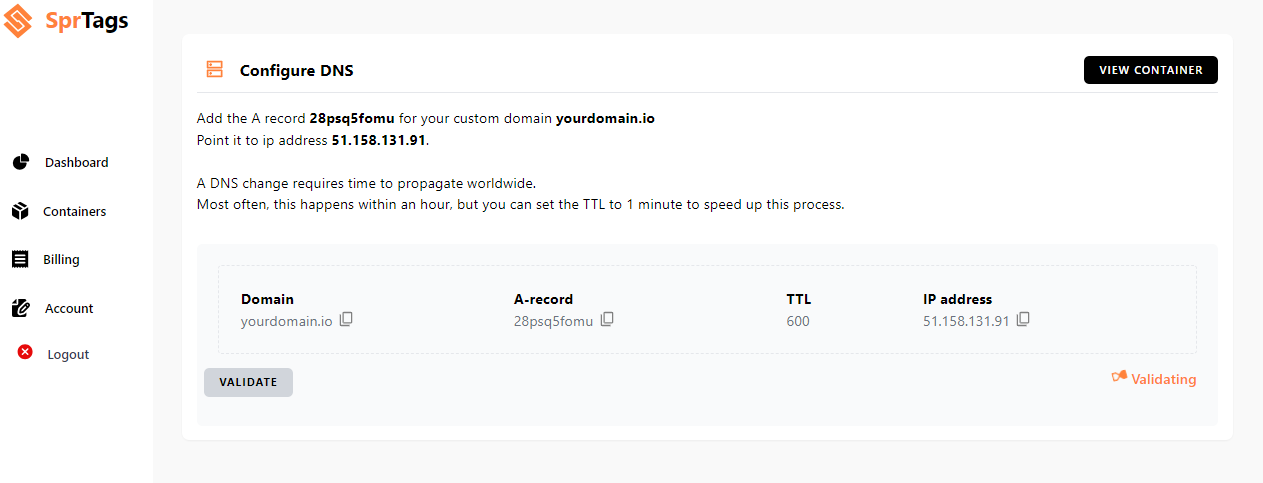
You will be redirected to Stripe checkout where you need to enter your creditcard details and billing address.When you have chosen a custom domain then dns information is shown which you need to add to your dns settings and if you have chosen sprtags.io as your domain then you will directly go to your container detail page.
The dns is being validated in the background and we will notify you as soon as the dns is validated. Dns propagation always takes some time.In the meantime you can already start with the implementation.
Addons
Besides the basic server side container we offer a wide range of addons, which give you more control over the data in the incoming requests.You can find more information about the add-ons in Resources -> Add-ons
Implementation
When you have spinned your container then you can start with the implementation and the fun begins.Read more about what it takes to implement server side tagging the right way.