Add-on
xUserAgent
The X-UserAgent add-on allows you to directly identify the device the visitor is using to interact with your content.
The X-UserAgent add-on allows you to directly identify the device the visitor is using to interact with your content.
This addon works by extracting the device information from the user-agent header which is set by the visitor's browser on each request.
There is a great variety of user-agent header strings, and this addon covers the most used ones, but in some cases of exotic or brand new browsers/devices, it can fail with the identification of some parameters.
Once you enable this addon, all the requests coming from your website will contain the following X-Headers:
- X-Device-Browser:
Chrome/Firefox/Safari/Edge/... - X-Device-Browser-Version:
The version of the web browser. - X-Device-Engine:
AppleWebKit/Gecko - X-Device-Engine-Version:
The version of the device engine. - X-Device-Mobile:
True/False - X-Device-Os:
Linux/Windows/Mac OS X/iOS/Android
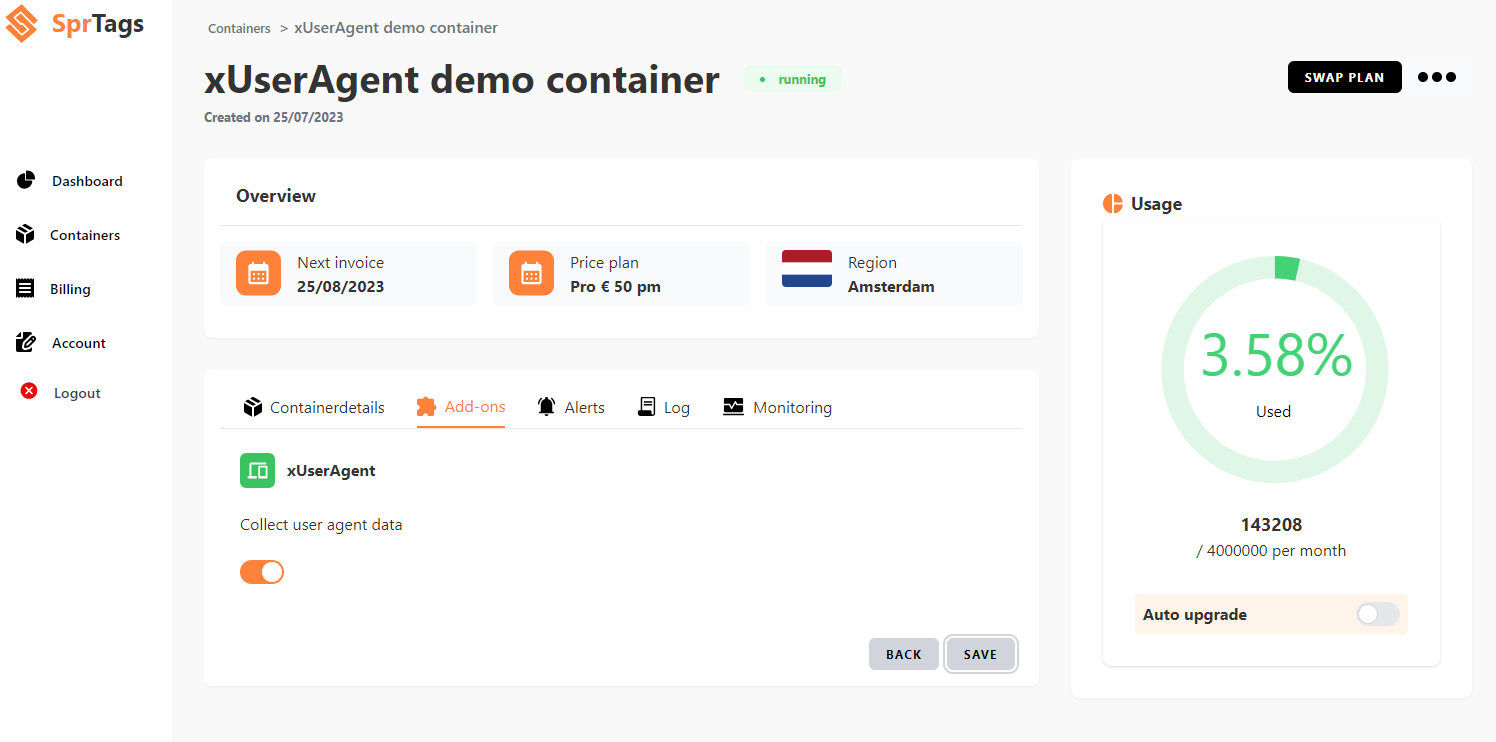
To use the xUserAgent addon, you simply need to go sprtags.io Containers -> Add-ons -> xUserAgent and enable it:
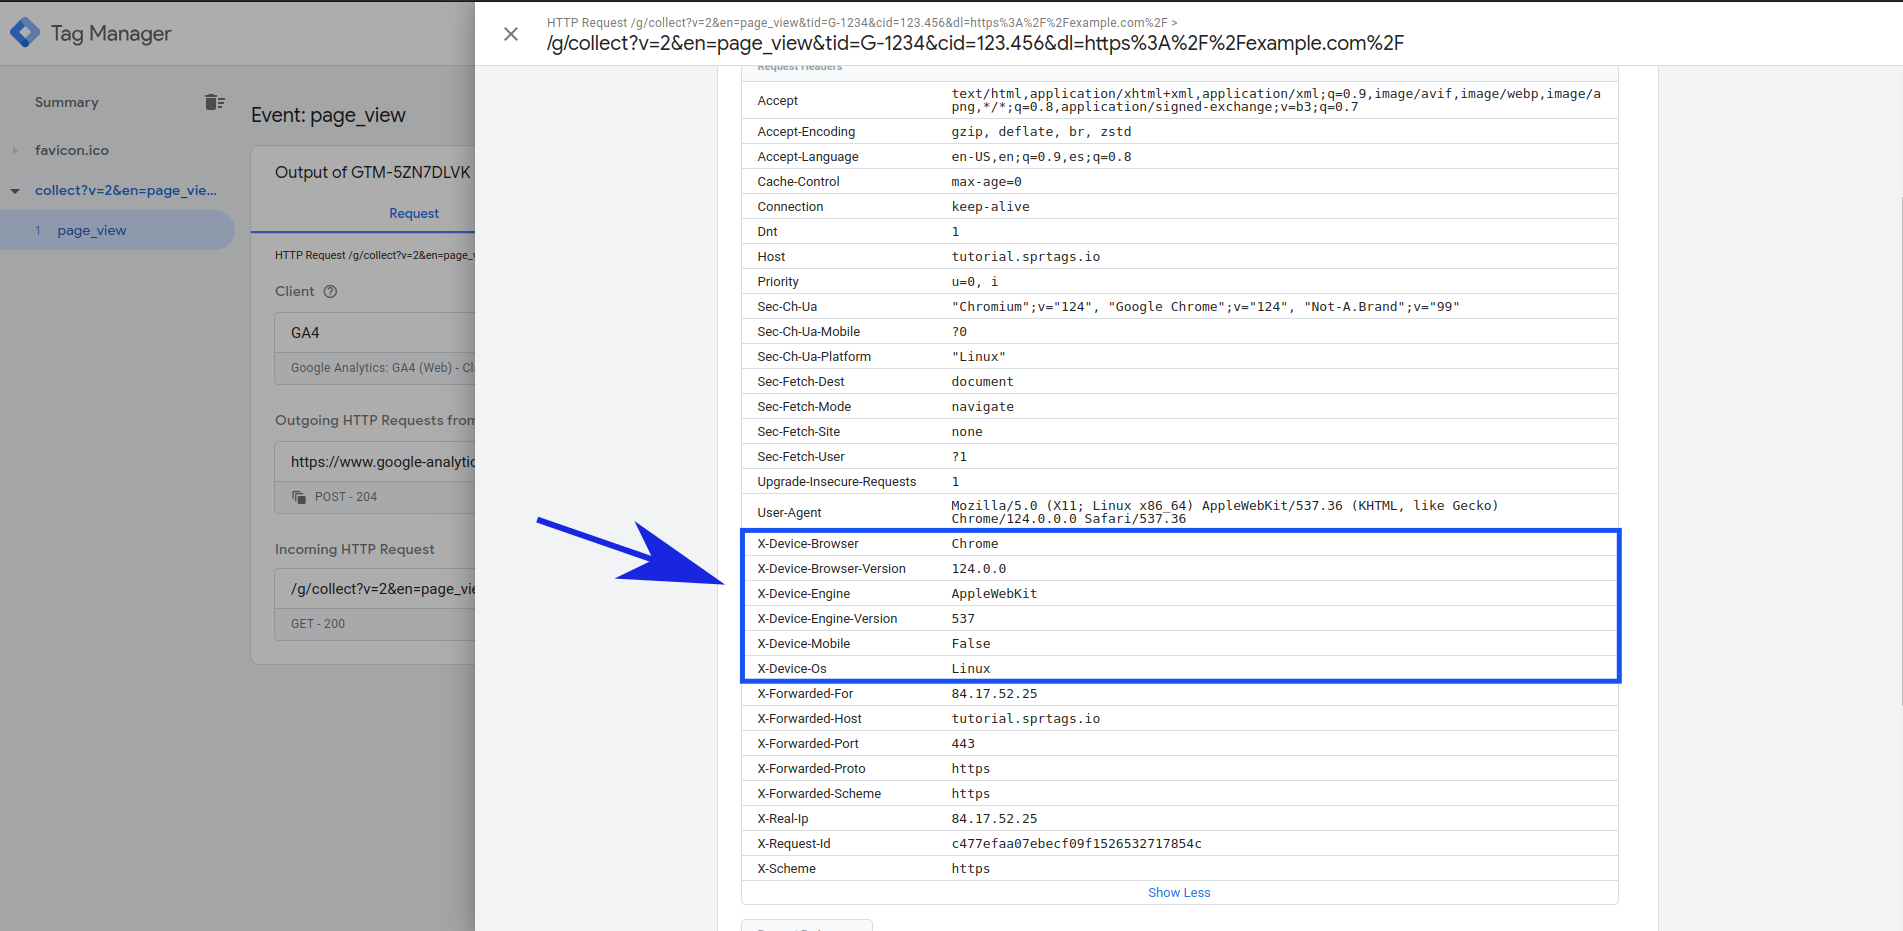
Once enabled, you can just open the preview mode of the server side container and see that the new headers with the new user agent information are present.
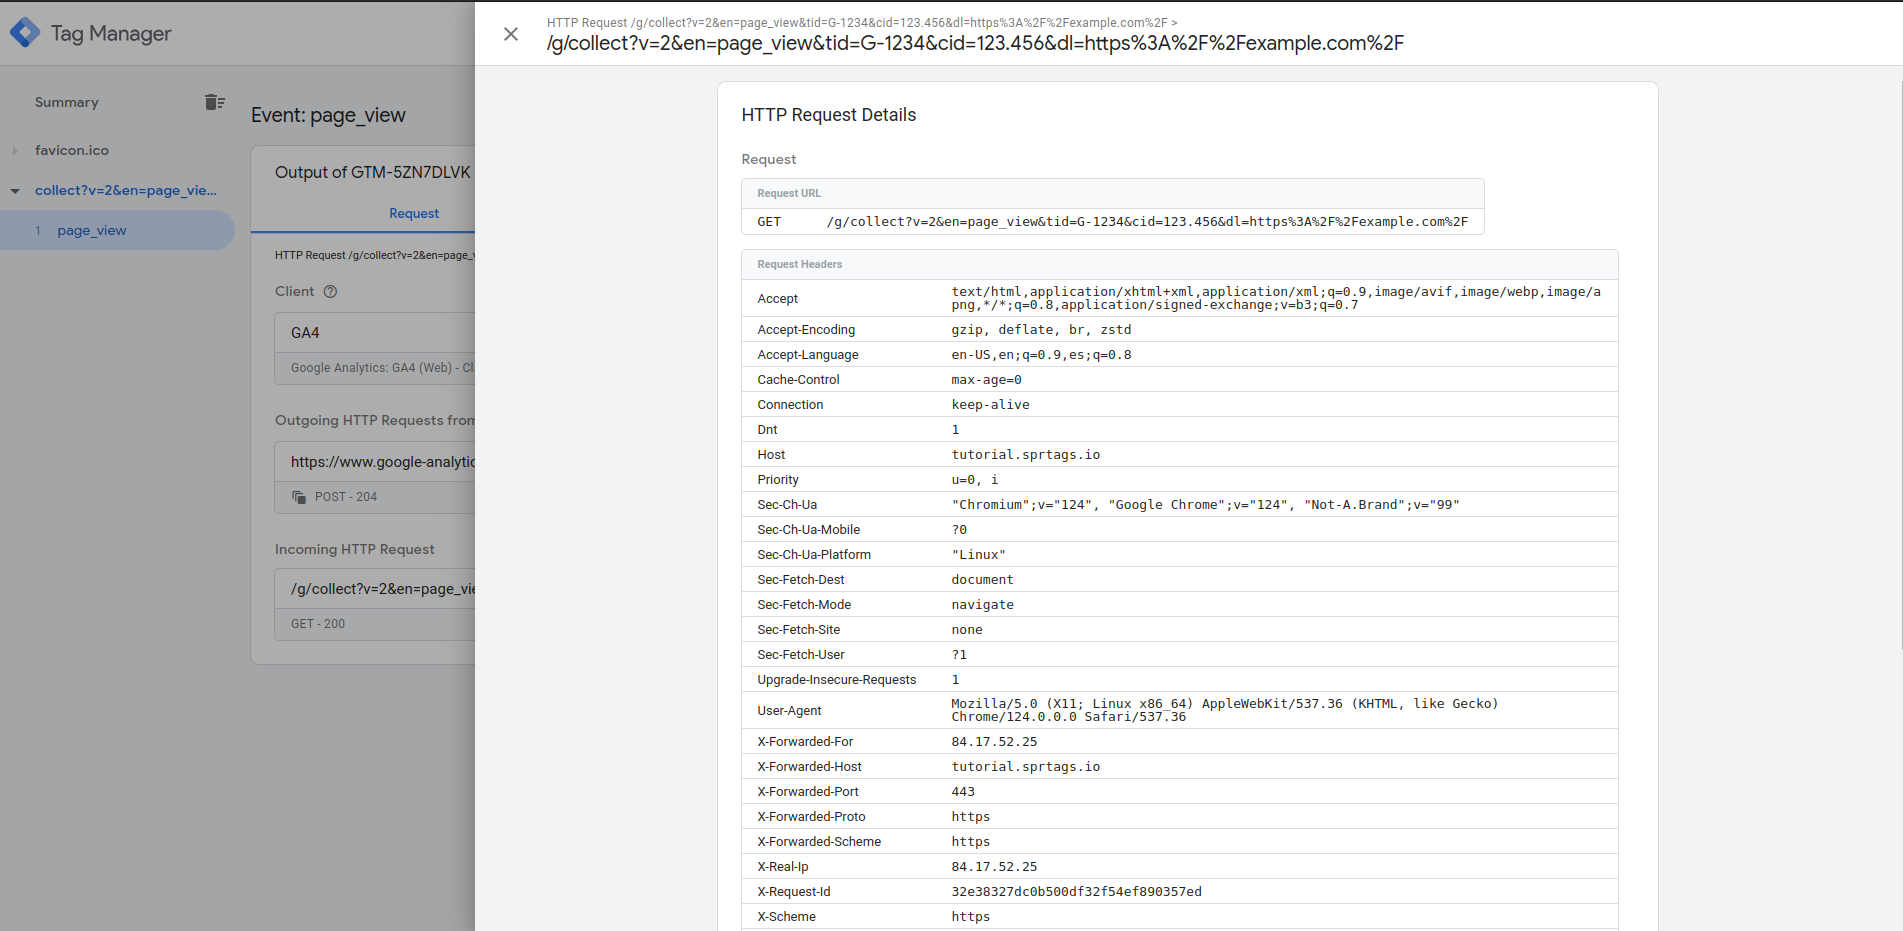
To send requests to the server side container and make them show on the preview mode, you will need to open the preview mode of your web container and debug your website.
If we inspect the incoming HTTP request, we should be able to see the X USER AGENT headers with the device information:
With xUserAgent disabled:
With xUserAgent enabled:
As you can see in the screenshot, all the information was detected successfully.
According to the new headers, the user was browsing with Google Chrome and making use of a computer with Linux.
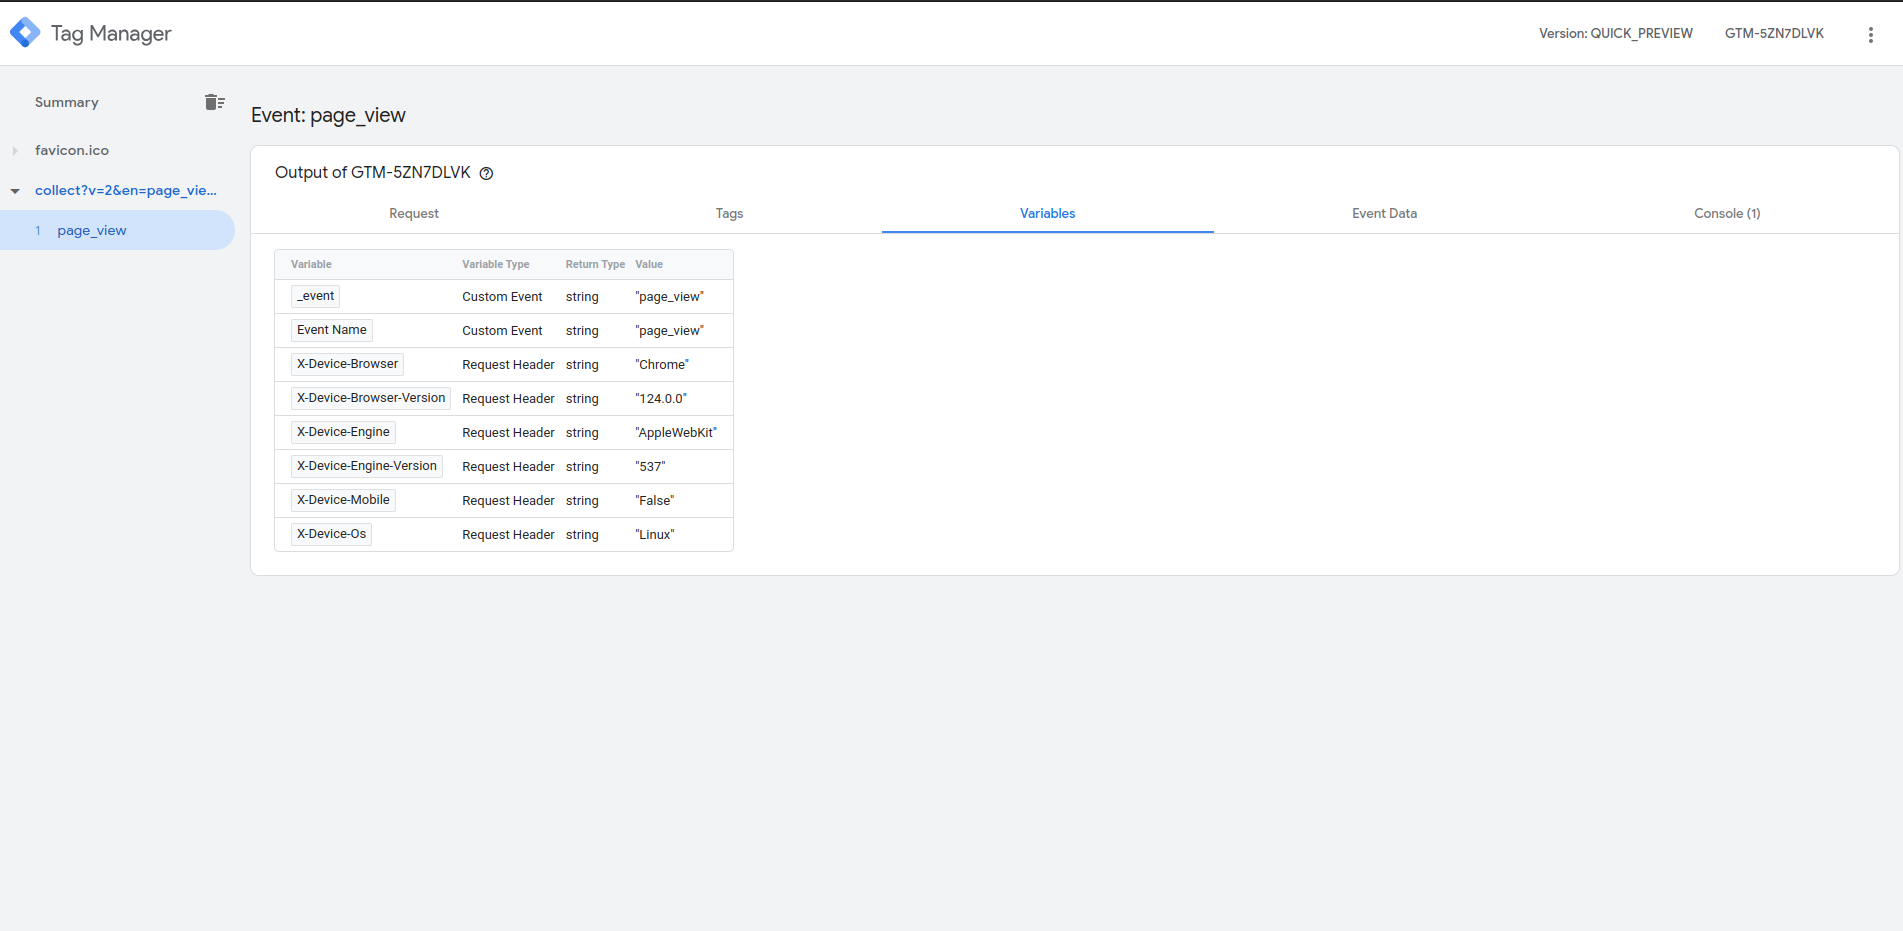
To map these headers to gtm tags you have to go to your server side container and:
- Click on Variables.
- In User-Defined Variables click on new.
- Select Request Header as variable type.
- Enter the header name in the name field.
- Give the variable a name and click save.
- Repeat for all the headers.

If we reopen the preview mode and repeat the tests, the variables with the header values will be showing:
Now, you are ready to send the device information with your tags.